Quickstart Guide
This guide is the recommended starting point for new users. It will cover:
- Adding services
- Adding products to the inventory
- Managing clients
- Scheduling appointments
- Viewing appointments
- Creating invoices and collecting payments
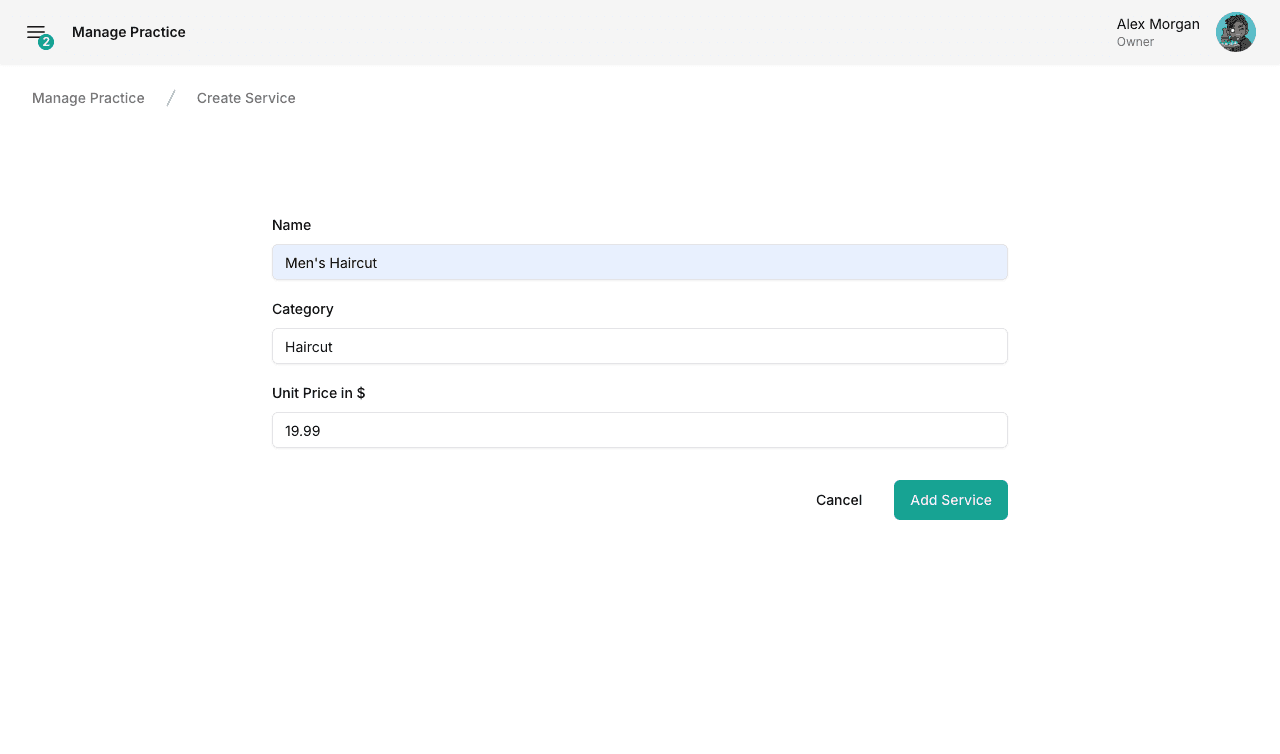
Adding Services
- Navigate to services settings by:
- Click on the "New Service" button.
- Fill out the details; then click the "Add Service" button.
- Repeat steps 2-3 for each service you provide.
- Optional: Services can be added in bulk using the import/export buttons.
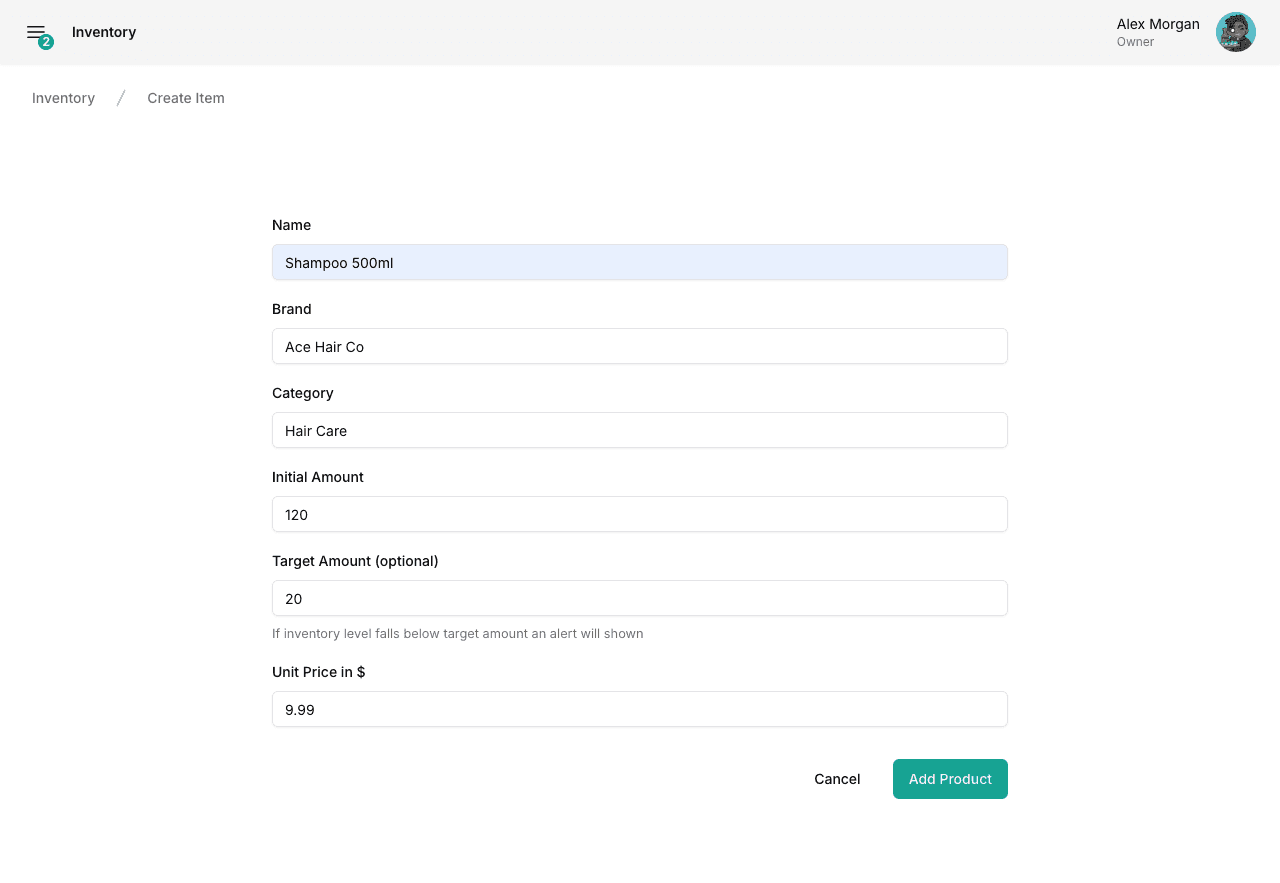
Adding Products to the Inventory
- Navigate to inventory by:
- Click on the "New Product" button.
- Fill out the details; then click the "Add Product" button.
- Repeat steps 2-3 for each product you sell.
- Optional: Products can be added in bulk using the import/export buttons.
Managing Clients
Registering Clients
- Open the New Client panel by:
- pressing the "c" key on your keyboard.
- or selecting Main Navigation → New Client.
- or navigating to Main Navigation → Clients and clicking the "New Client" button.
- Fill out the details; then click the "Save" button.
- Repeat steps 1-2 as many times as needed.
- Optional: Clients can be registered in bulk using the import/export buttons.
- Client intake fields can be customized by navigating to

Searching Clients
Client profiles can be searched by:
- pressing the "f" key on your keyboard.
- or selecting Main Navigation → Find Client
- or navigating to Main Navigation → Clients
- Enter the client name, email address or phone number into the search bar.
- Click the 3 dots (more actions) button on the desired client.
- Click the "View Profile" button.
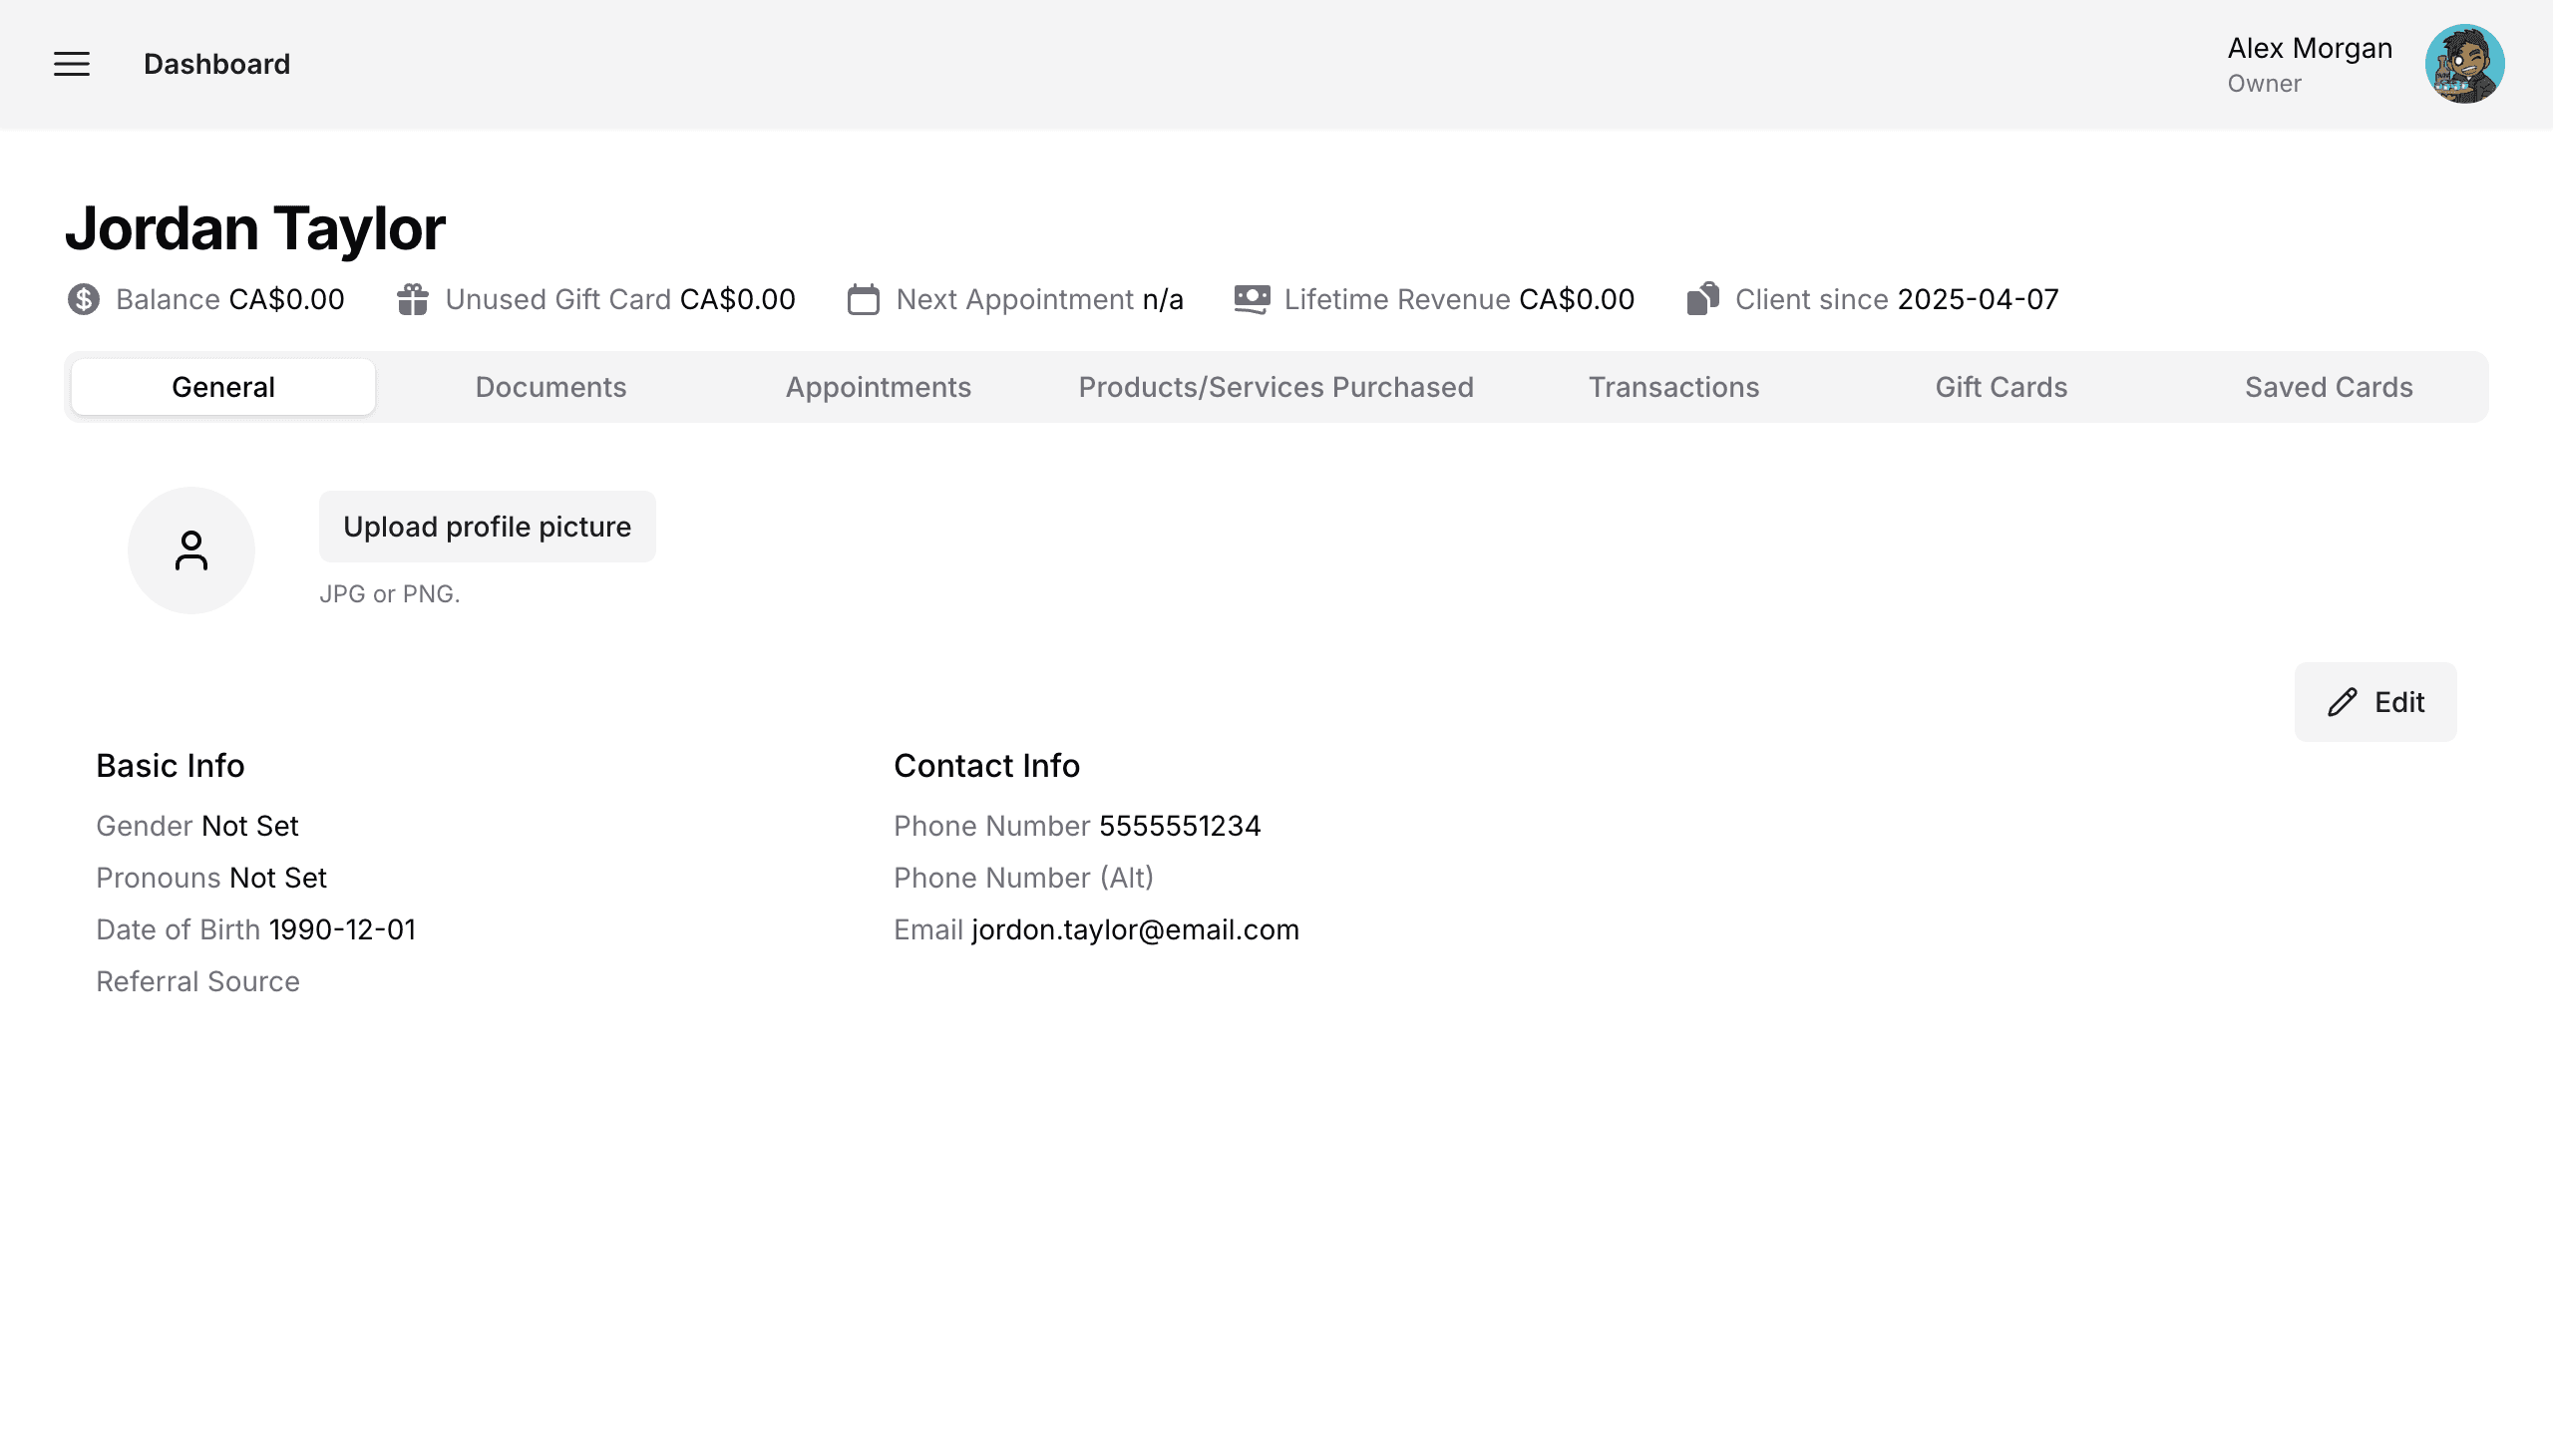
Client Profile
The client profile page can be used to:
- Update client's information.
- Attach forms, add notes or upload files to client's profile.
- Add an invoice or process a payment for the client.
- View client's past or upcoming appointments.
- View client's transaction history.
- Manage client's gift cards.
Scheduling Appointments
Basic Scheduling
- Open the Create Appointment panel by:
- navigating to Main Navigation → Schedule, then clicking on the desired timeslot.
- or pressing the "a" key on your keyboard.
- Fill out the details; then click the "Create" button.
- Repeat steps 1-2 as many times as needed.

Additional Options
- Appointment tags can be added when scheduling or editing appointments.
- New tags can be created at Main Navigation → Manage Practice → Appointments Tab
- Tags are useful for organizing/filtering appointments in the Schedule view.
- Video Call option can be used if the practitioner being scheduled has connected their Google Meet account to their Frontdeskify account. This can be done by having the practitioner:
- Log into their Frontdeskify account.
- Go to their User Settings Page by clicking on their Avatar on the upper-right of the dashboard.
- Click the "Connect" button in the Google Meet section.
- Complete login with their Google/Gmail account.
- If Forms are attached to the appointment being scheduled, the client will receive an email prompting them to complete these forms.
- The preset "Incomplete Intake Info" is managed by Frontdeskify. The response from this form will automatically update the client profile.
- Custom forms can be created in:
- The results of custom forms will be viewable within the appointment or from the Documents tab of the client's profile.
Viewing appointments
There are multiple ways to find and view appointments.
- From the Schedule view.
- Navigate to the desired date/week.
- Click on the desired appointment.
- If you wish to view appointments for a particular client:
- Navigate to their client profile.
- Select the Appointments tab.
- Click the 3 dots (more actions), then the "View" button.
- Upcoming appointments today and tomorrow are conveniently displayed on the Dashboard Home Page.
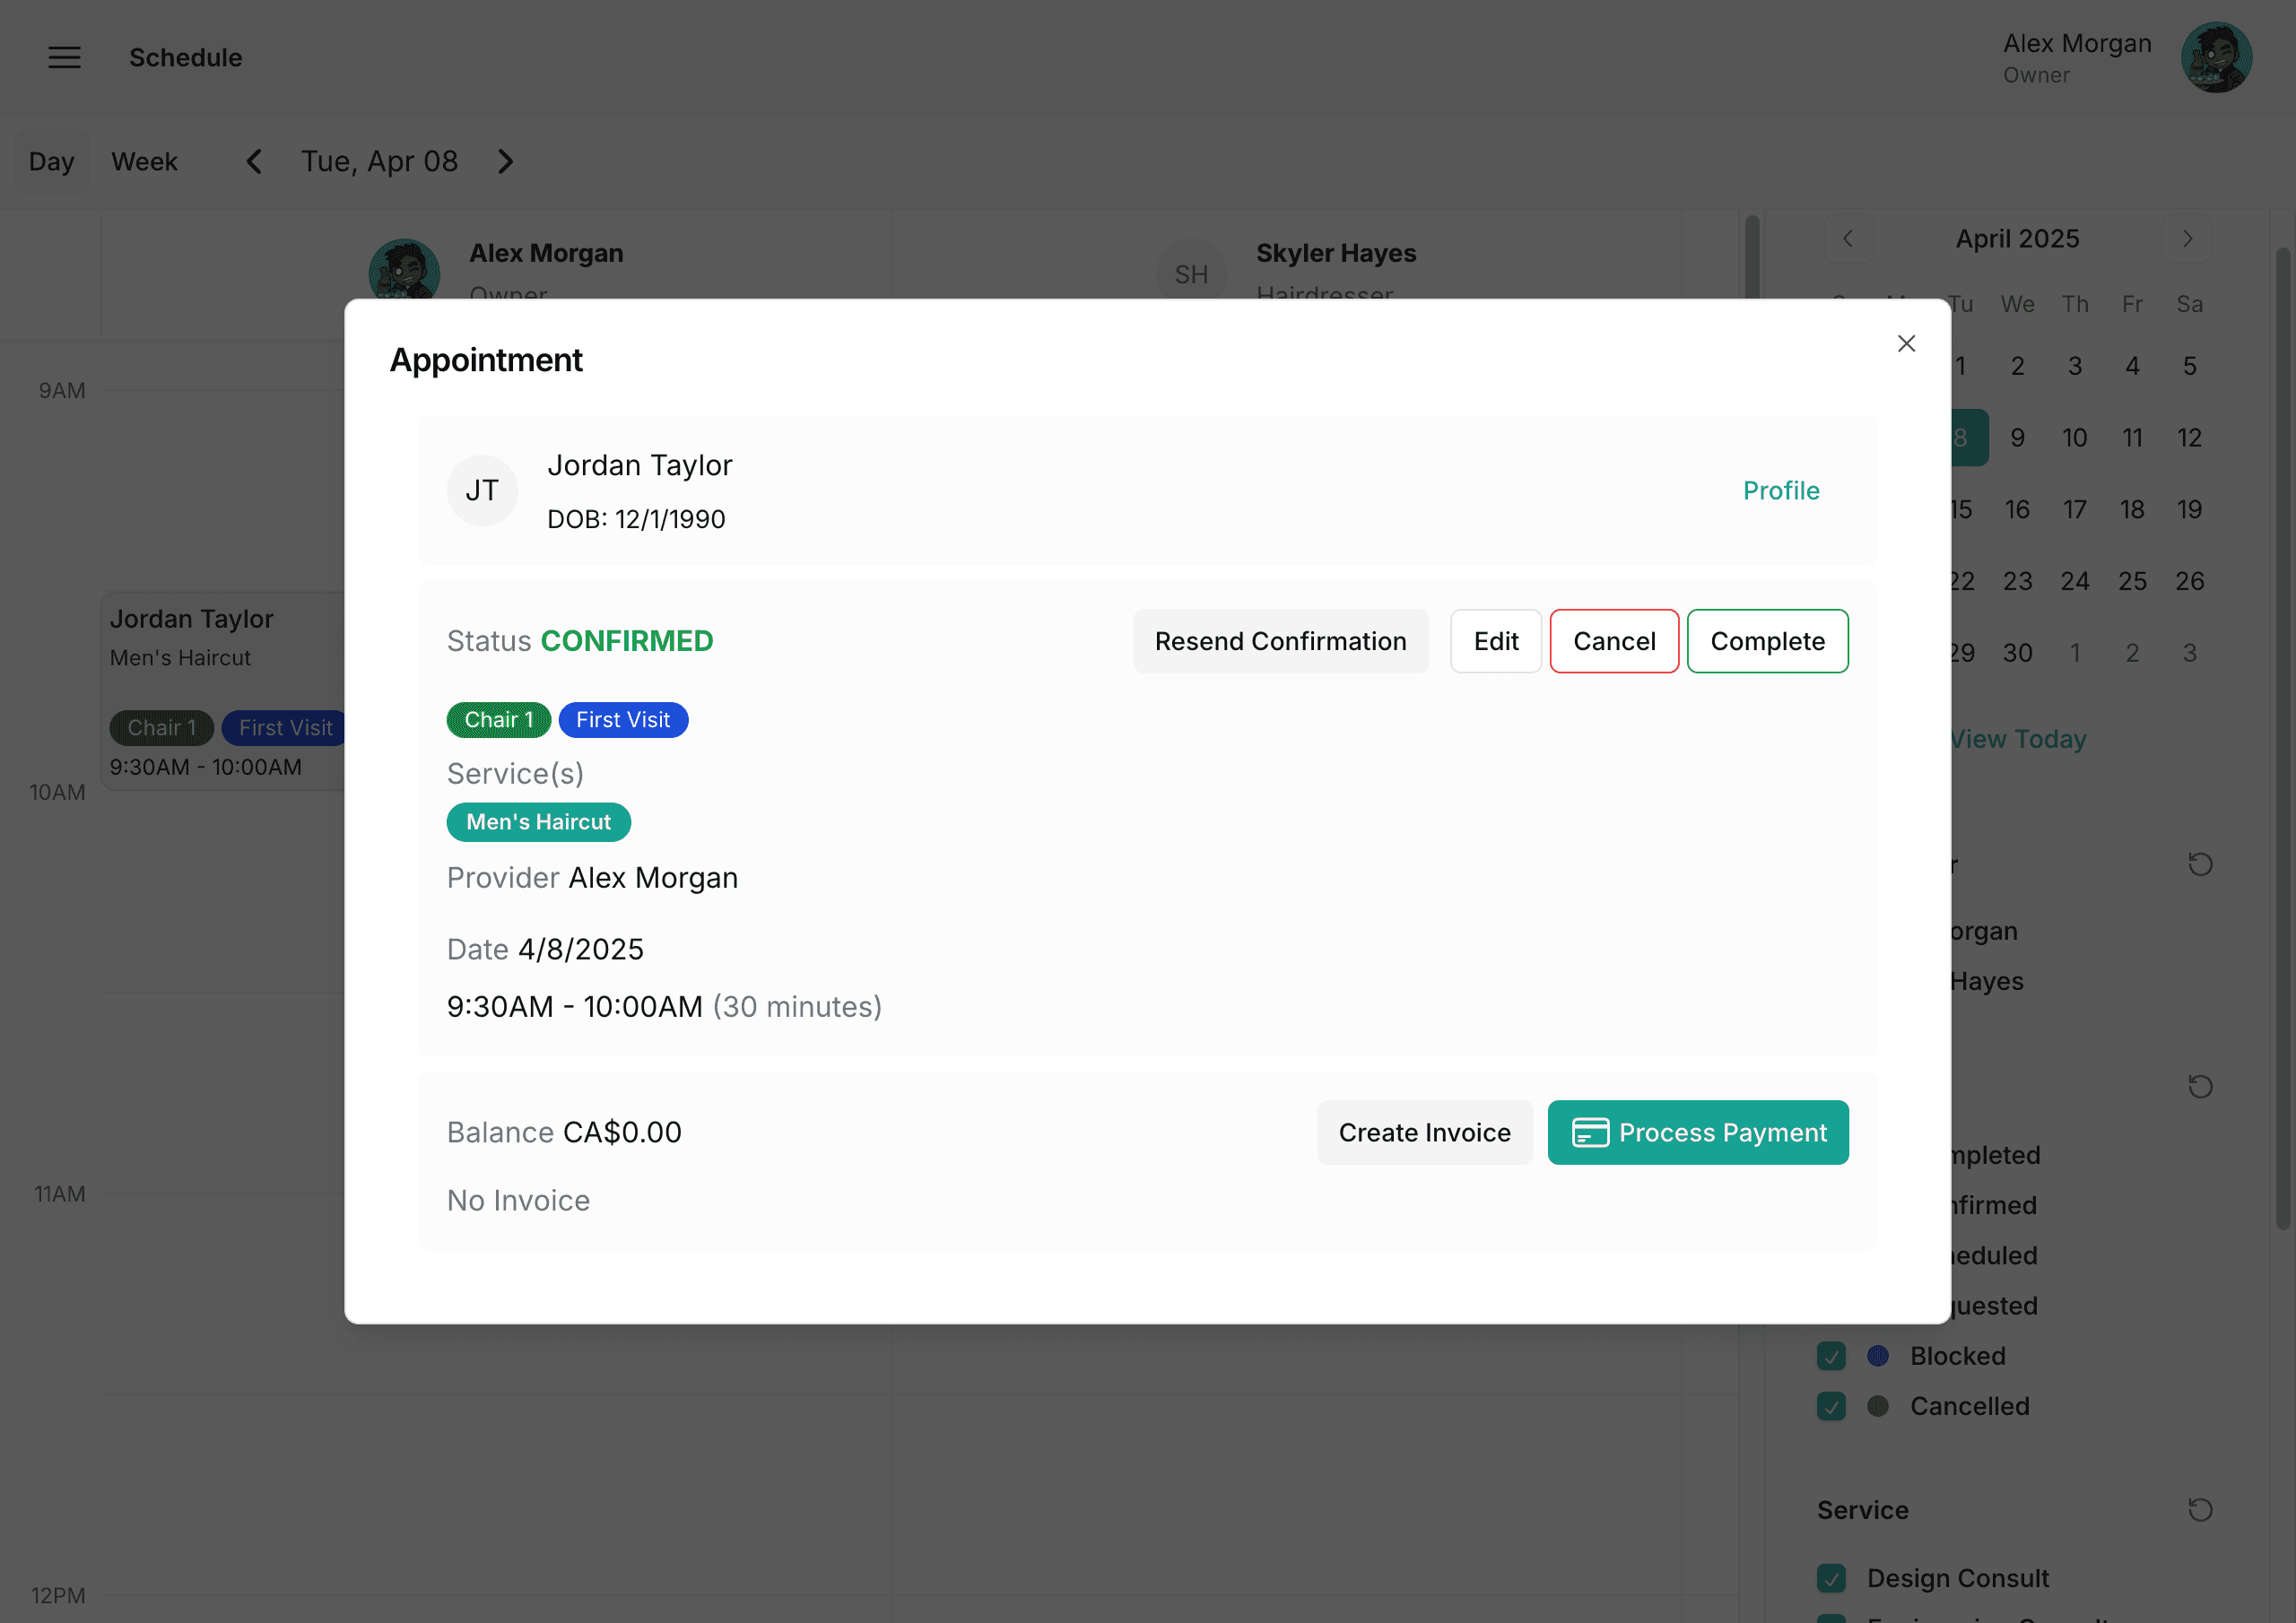
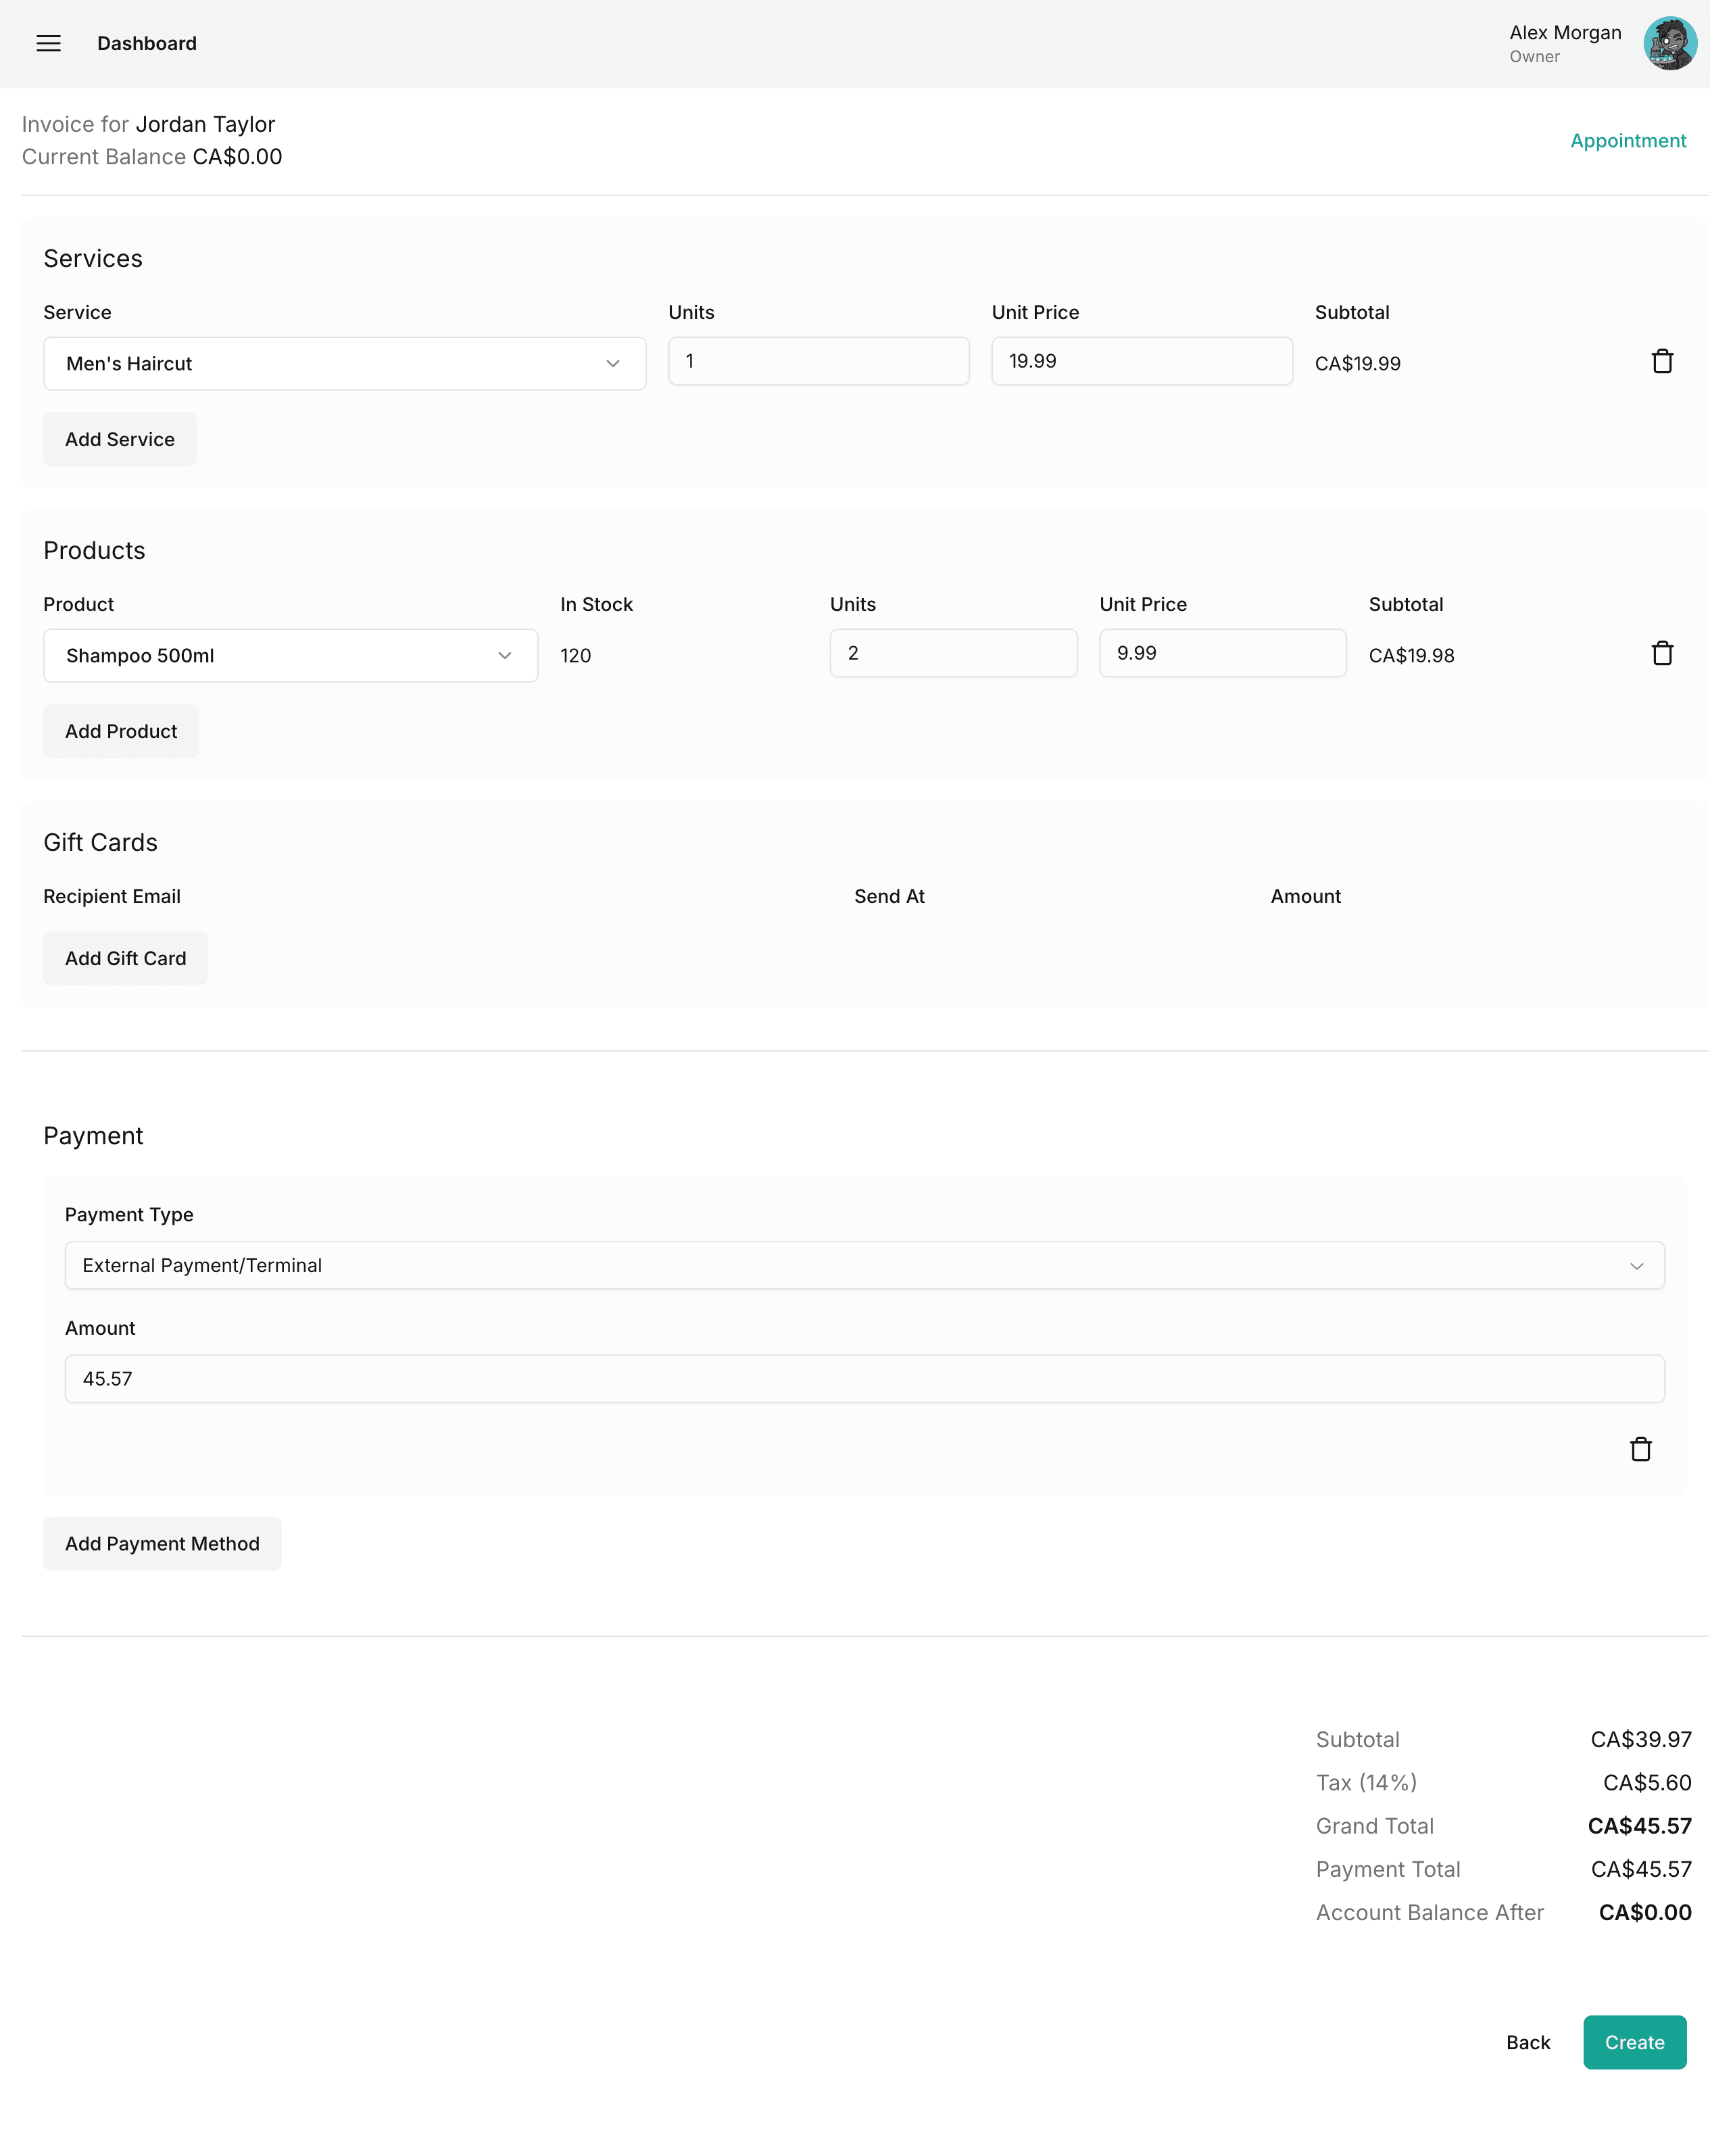
Creating Invoices and Payments
- Invoices/Payments can be created by:
- Clicking the "Create Invoice" or "Process Payment" button while viewing an appointment.
- or navigating to the Transactions tab of a client profile and clicking the "Create Invoice" or "Process Payment" buttons.
- Payment methods can be added when creating invoice to reduce the amount of actions required every time a sale is made.
Next Steps
- View the other guides.
- It is recommended that you explore all the options under Manage Practice to get the most out of your Frontdeskify experience.
Editing practice settings is restricted to accounts with Owner and Administrator permissions.