Website Setup
Frontdeskify will host a website for your business. This site is a great way to interact with your existing clients and provides needed visibility for reaching new clients. This guide will cover:
- Customizing your website
- Registering a custom domain
Customizing your website
- Navigate to Website settings by:
- Edit settings across all the subtabs to achieve your desired website.
- To confirm changes click the "Save" button.

Website Settings Tabs
Settings
- Customize Site Description and Keywords. This helps your site to be placed higher in search results.
- Customize your website's navigation header.
- Information displayed in the footer section can be updated via Contact Info settings.
Home Page
- Customize the appearance of your home page using pre-styled options. Every option has been designed to be modern, aesthetically pleasing, functional and work across all screen sizes.
- Add images and text to the hero section.
- Add customer testimonials. (Optional)
- Removing testimonials will hide this section.
- Add images to the home page. (Optional)
- Removing images will hide this section.
- Add frequently asked questions and their responses. (Optional)
- Removing FAQs will hide this section.
Services
- Create a page containing services you provide and their description.
- This feature is optional. If you decide not to use it, the Services tab will be excluded from your website's navigation menu.
Gallery
- Create a page containing multiple image galleries.
- This feature is optional. If you decide not to use it, the Gallery tab will be excluded from your website's navigation menu.
Registering a custom domain
If you own a custom domain, you can make your website visible there instead of using the default [your_organization_id].frontdeskify.com.
- Navigate to Domain settings by:
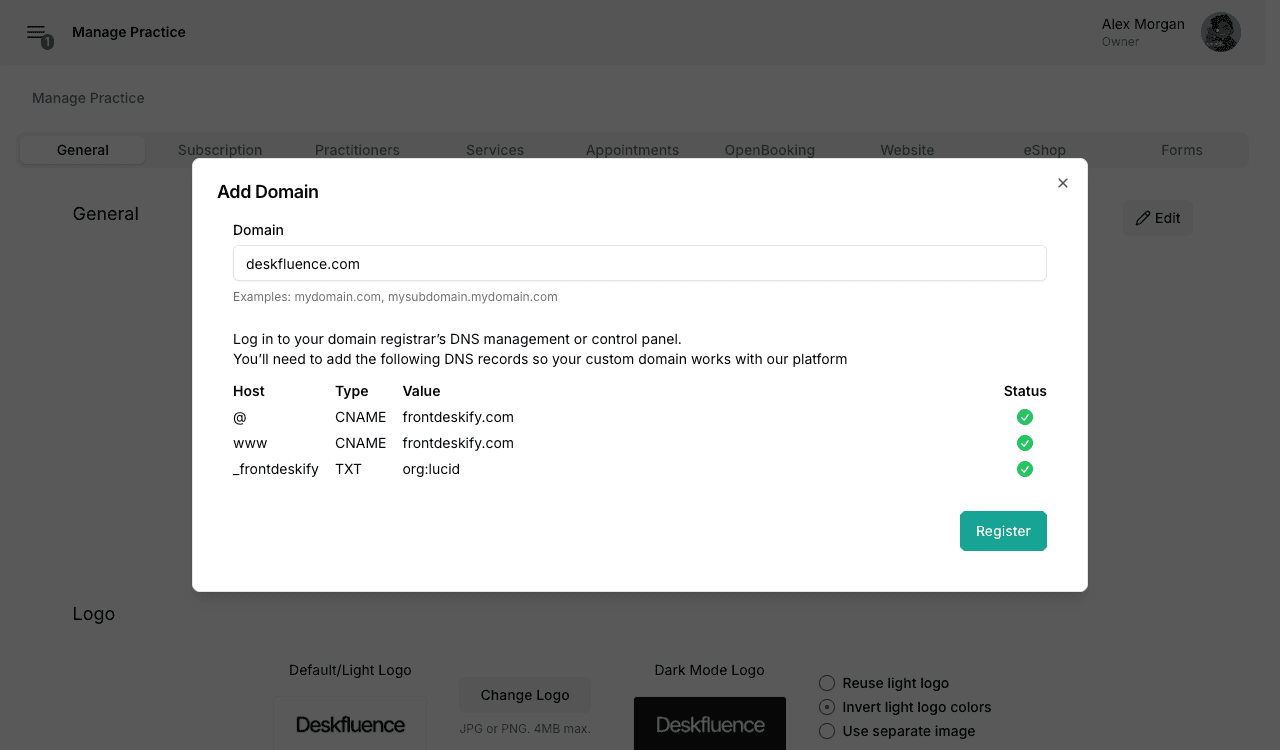
- Click the "Add Domain" button.
- Enter your custom domain (or sub-domain).
- Log in to your domain registrar’s DNS management or control panel.
- Add the DNS records shown.
- If you're not sure where to add DNS records, your registrar's help documentation should include a guide for managing DNS settings. You can also contact their support.
- Once the status of all the records have been validated, click the "Register" button to save settings.