OpenBooking Setup
Frontdeskify allows your client to self-book appointments through our OpenBooking feature. This guide will cover:
- Registering services for OpenBooking
- Accessing OpenBooking page
- Viewing OpenBooking appointments
- Linking OpenBooking appointments to existing clients
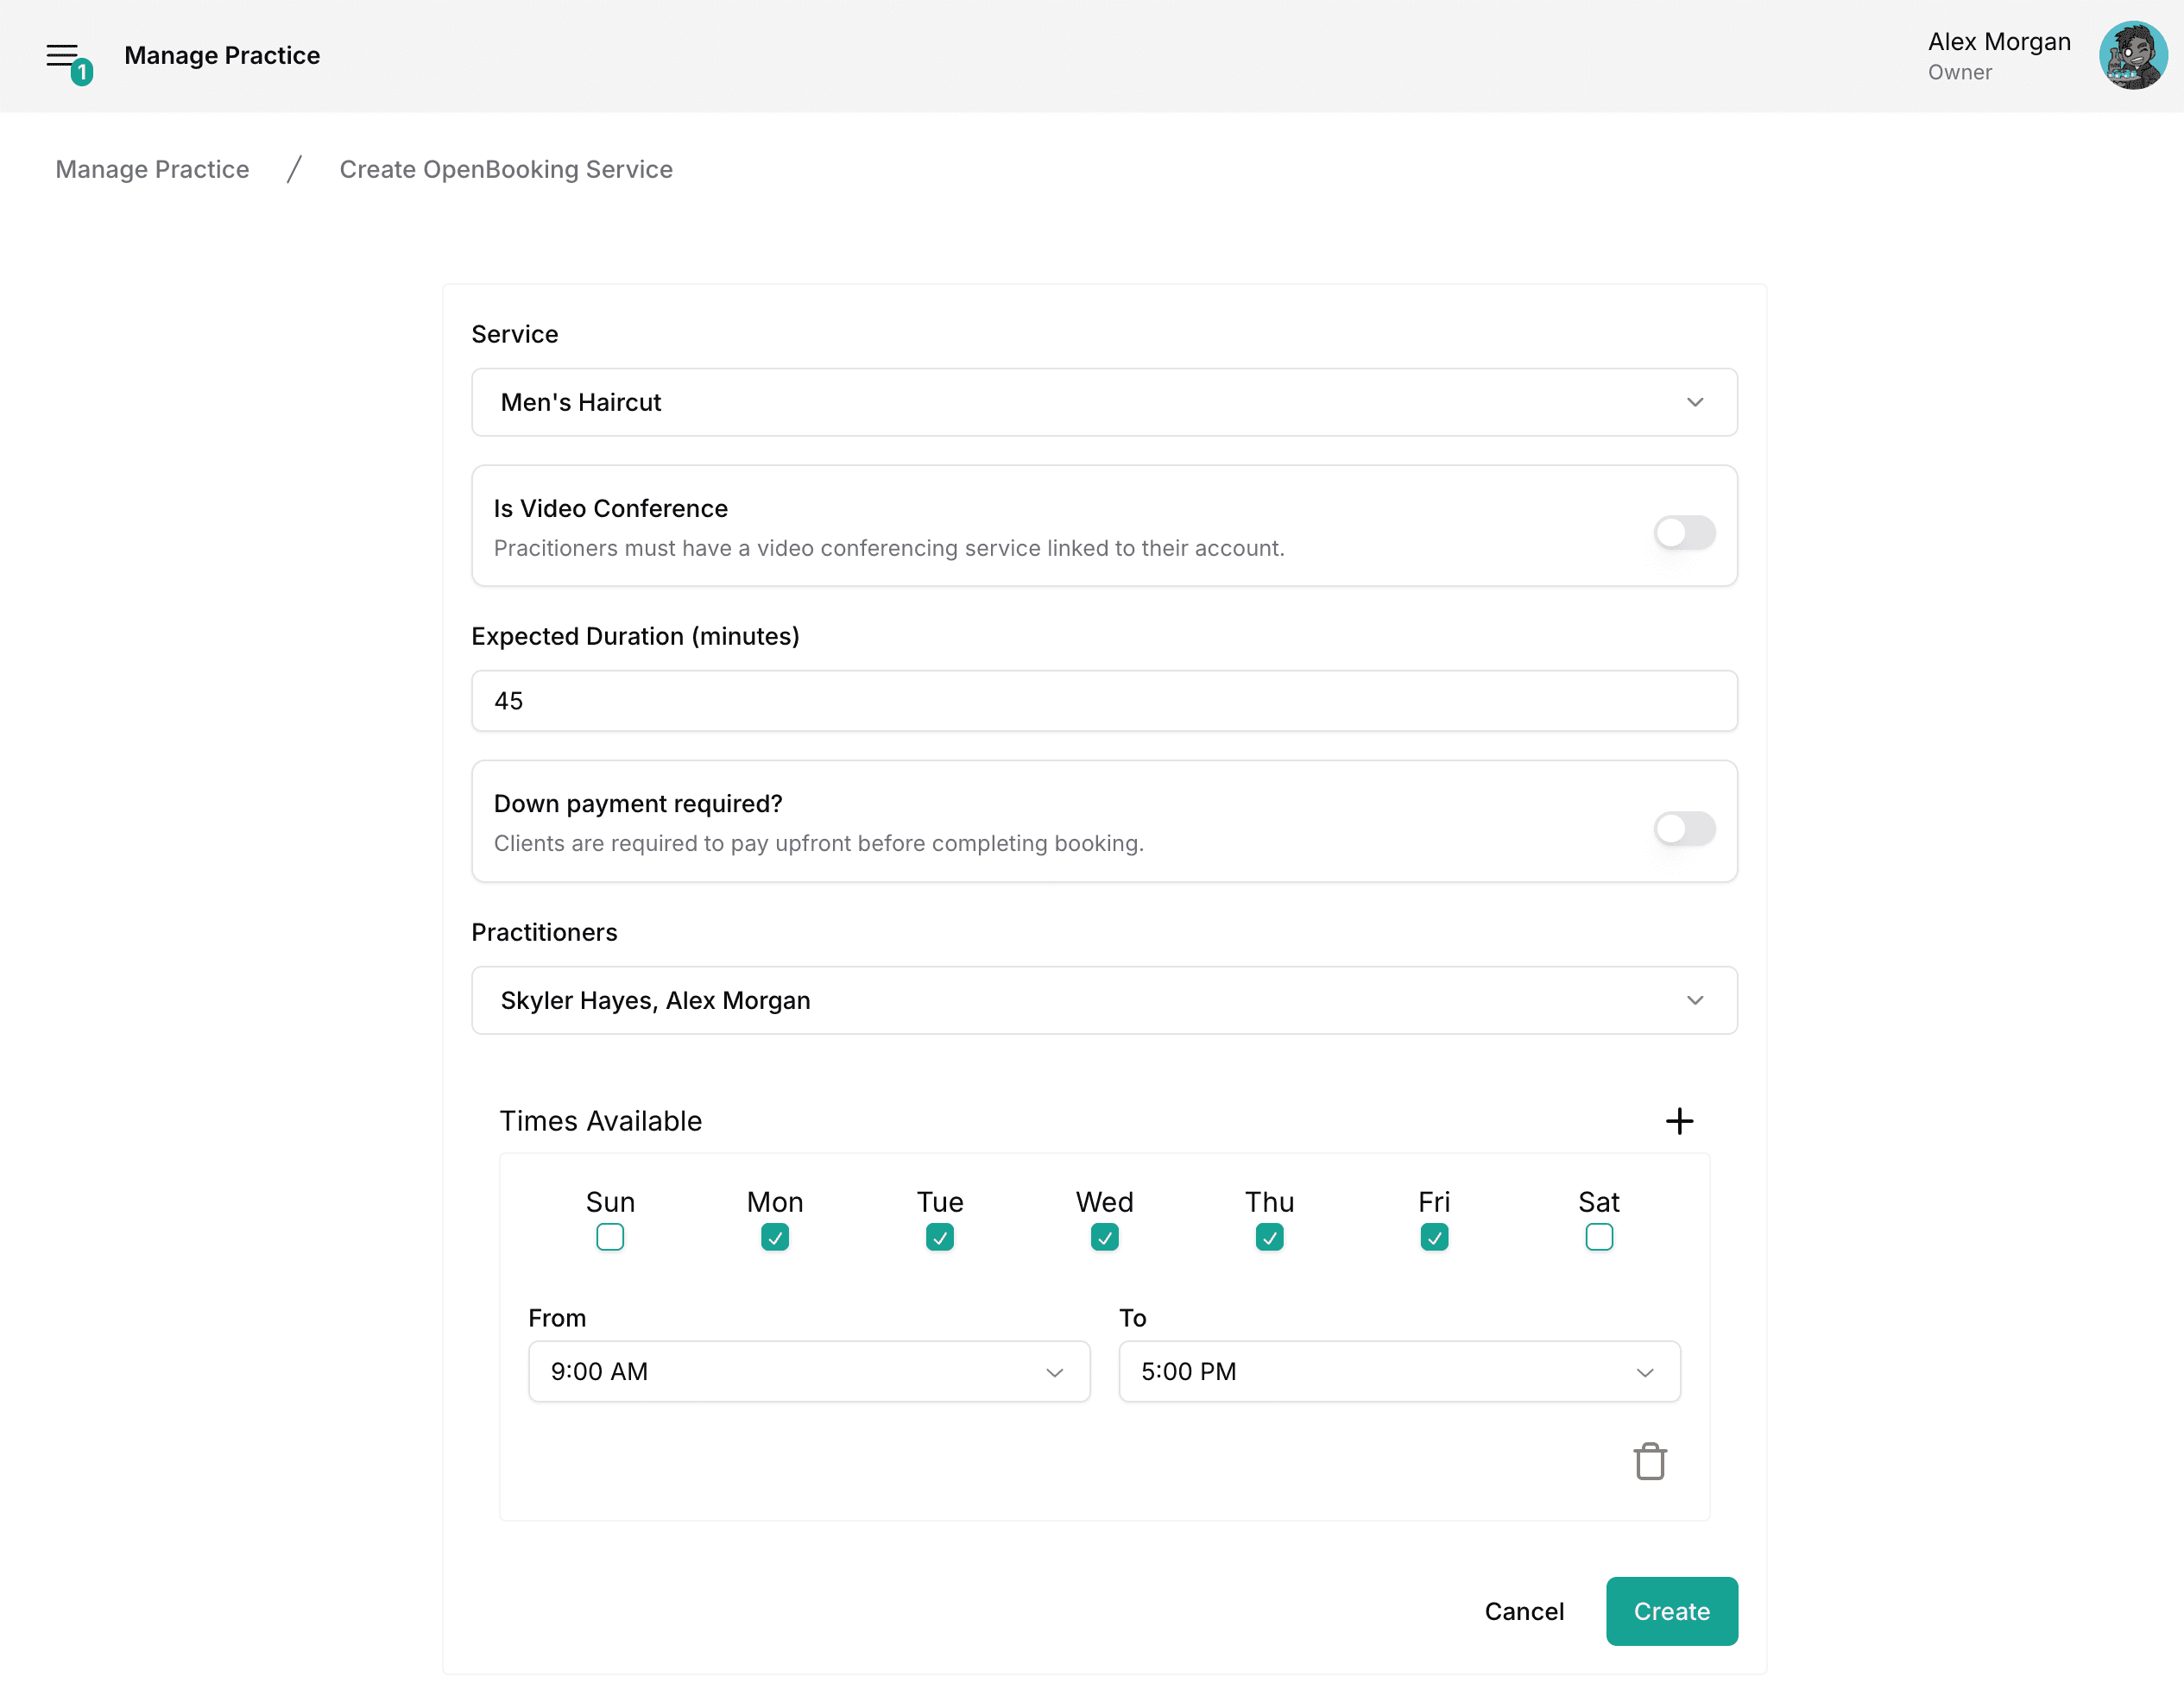
Registering services for OpenBooking
- Navigate to OpenBooking settings by:
- Click on the "Create" button.
- Fill out the details; then click the "Create" button.
- Repeat steps 2-3 for each service you would like clients to be able to self-book.
- If you have not configured any services yet, see this section of the quickstart guide.
- You can require a down payment in order for clients to self-book appointments. You must have a connected PayPal business account in order to use this option. See this section of the eShop setup tutorial for instructions.
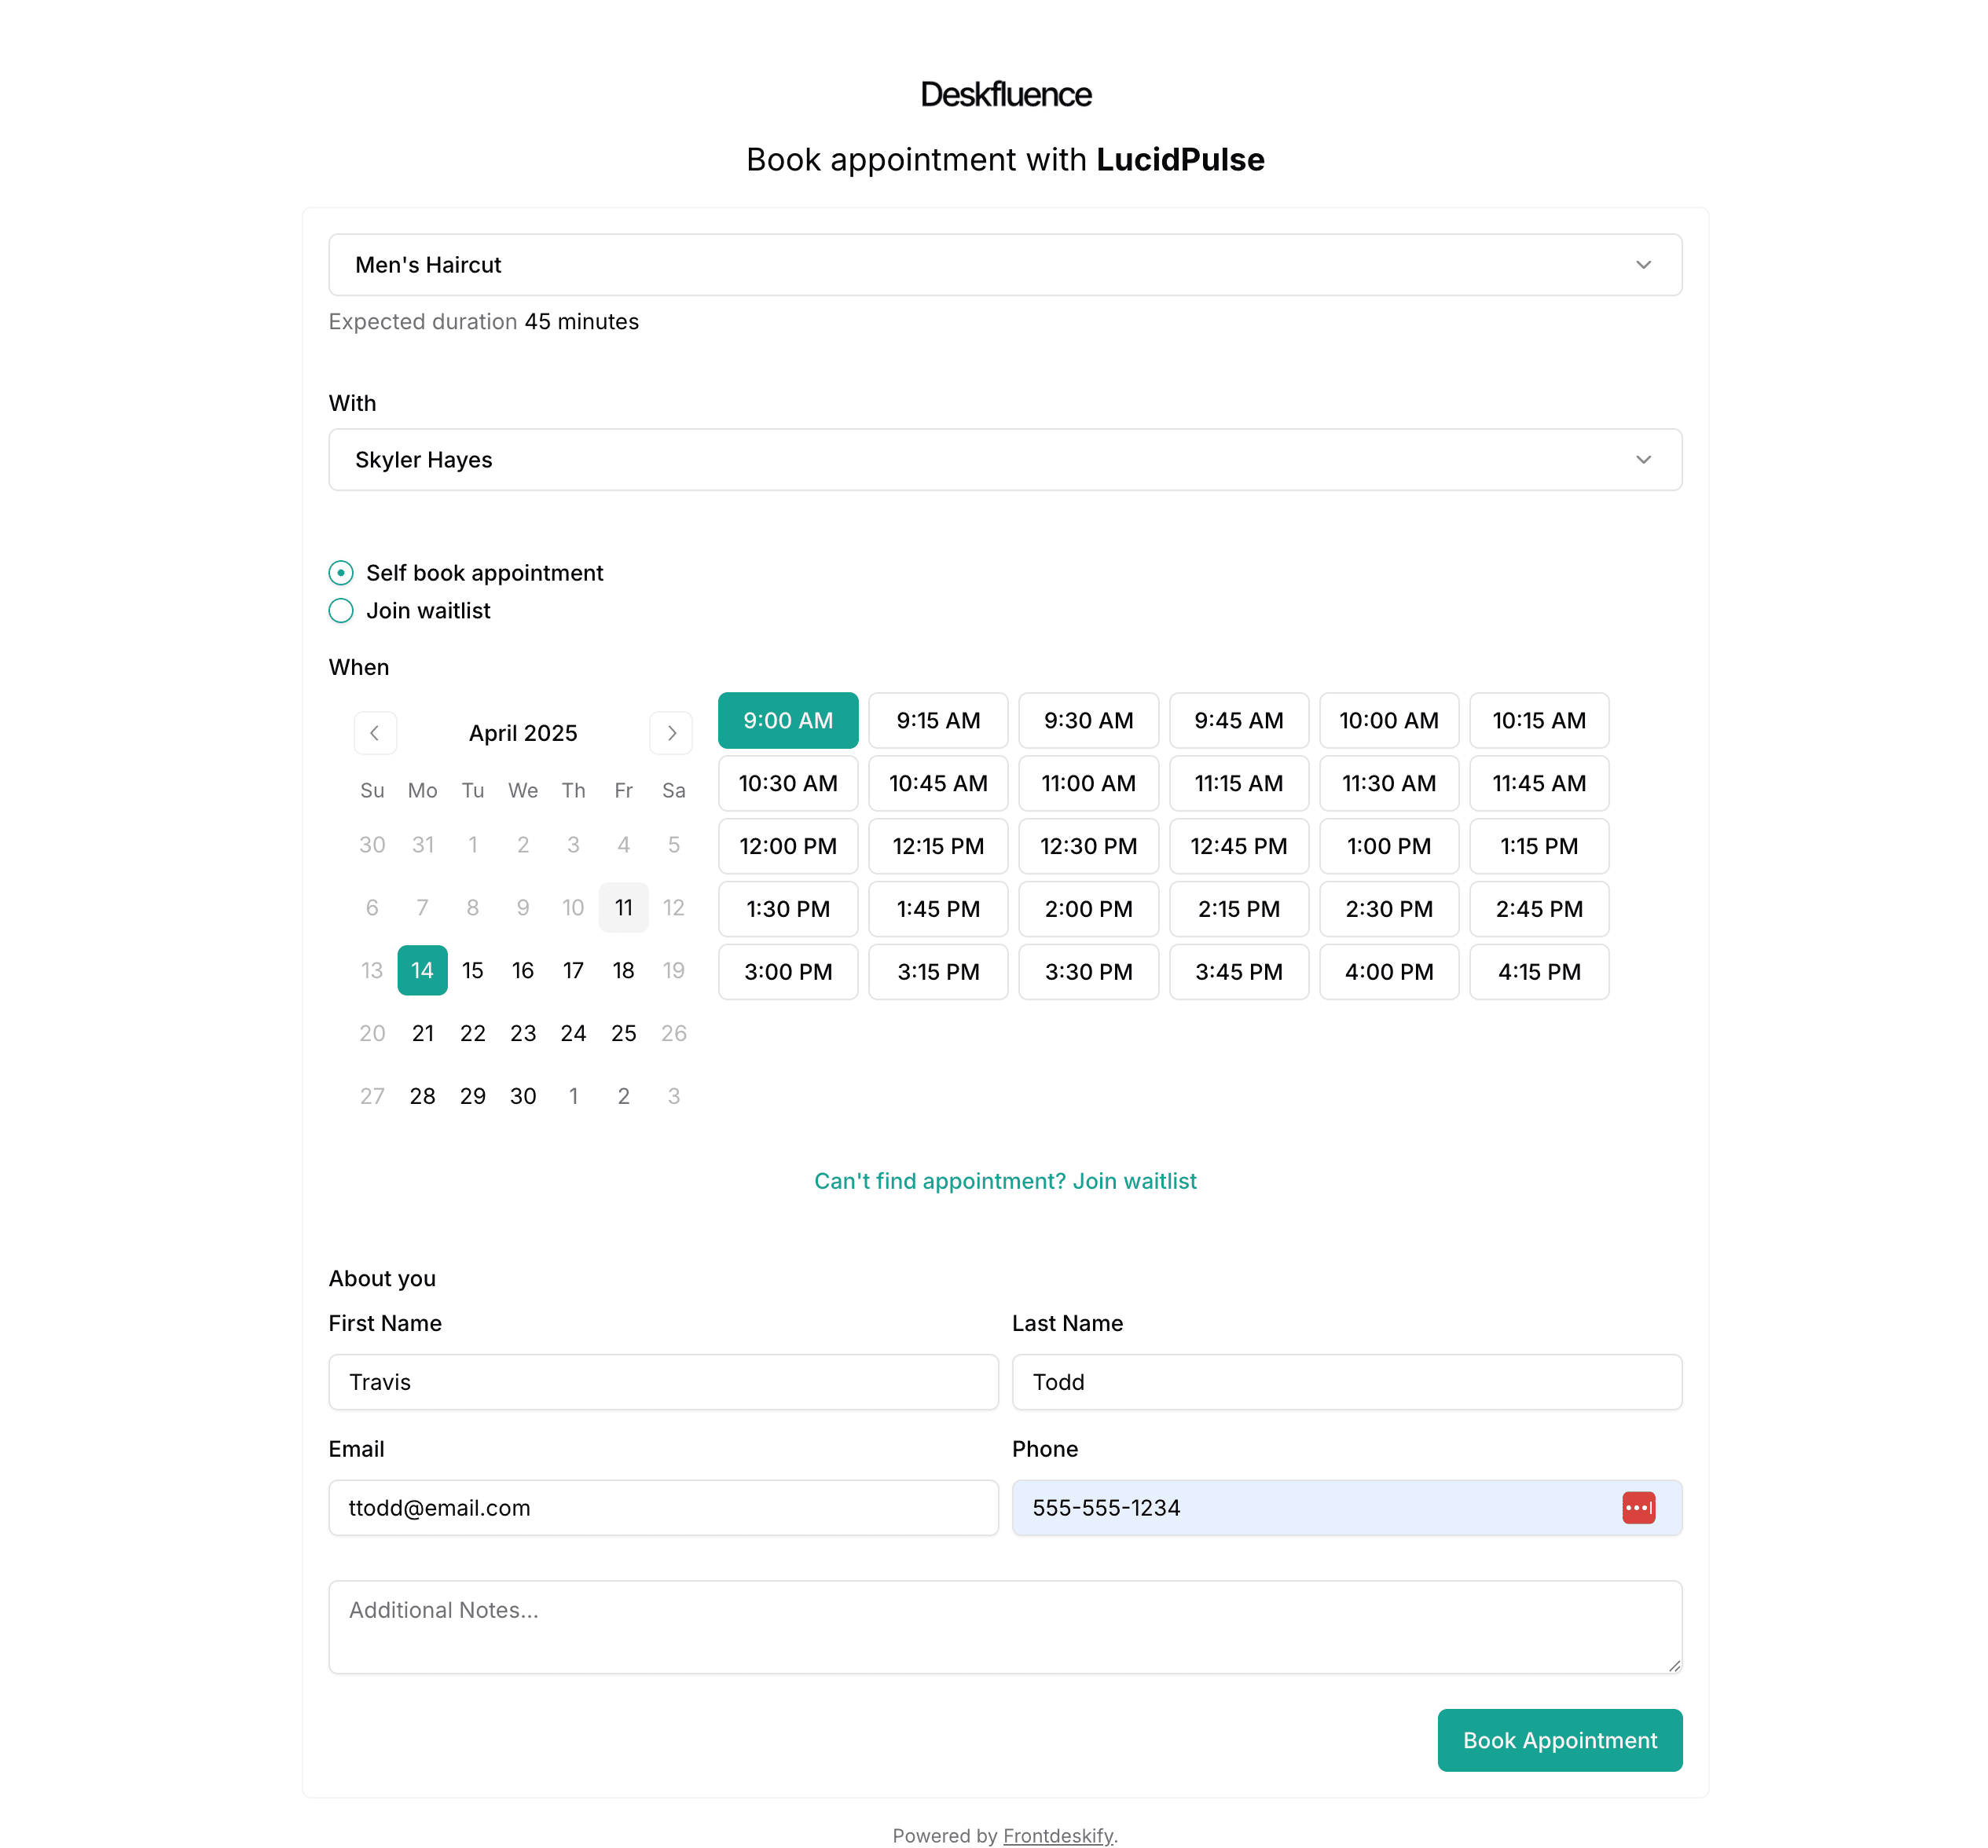
Accessing OpenBooking page
Once at least one service has been configured the client can self-book appointments by:
- Going to the Booking section of your website.
- Going to standalone booking page.
- Standalone link can be obtained from Main Navigation → Manage Practice → OpenBooking Tab.
Viewing OpenBooking appointments
OpenBooking appointments can be viewed by:
- OpenBooking Section
- Select Main Navigation → OpenBooking.
- Click the 3 dots (more actions) button on the desired appointment request.
- Click the "View" button.
- The number of pending OpenBooking requests will be shown on the main navigation.
- Waitlist Section (if client joined the waitlist)
- Select Main Navigation → Waitlist.
- Click the 3 dots (more actions) button on the desired waitlist request.
- Click the "View" button.
- The number of pending waitlist requests will be shown on the main navigation.
- Schedule View
- Select Main Navigation → Schedule.
- Navigate to the desired date/week.
- Click on the desired Requested appointment.
- The number of pending OpenBooking requests will be shown on the main navigation.
OpenBooking appointments can be confirmed or rejected from this view or converted to regular appointments by linking to a client profile.
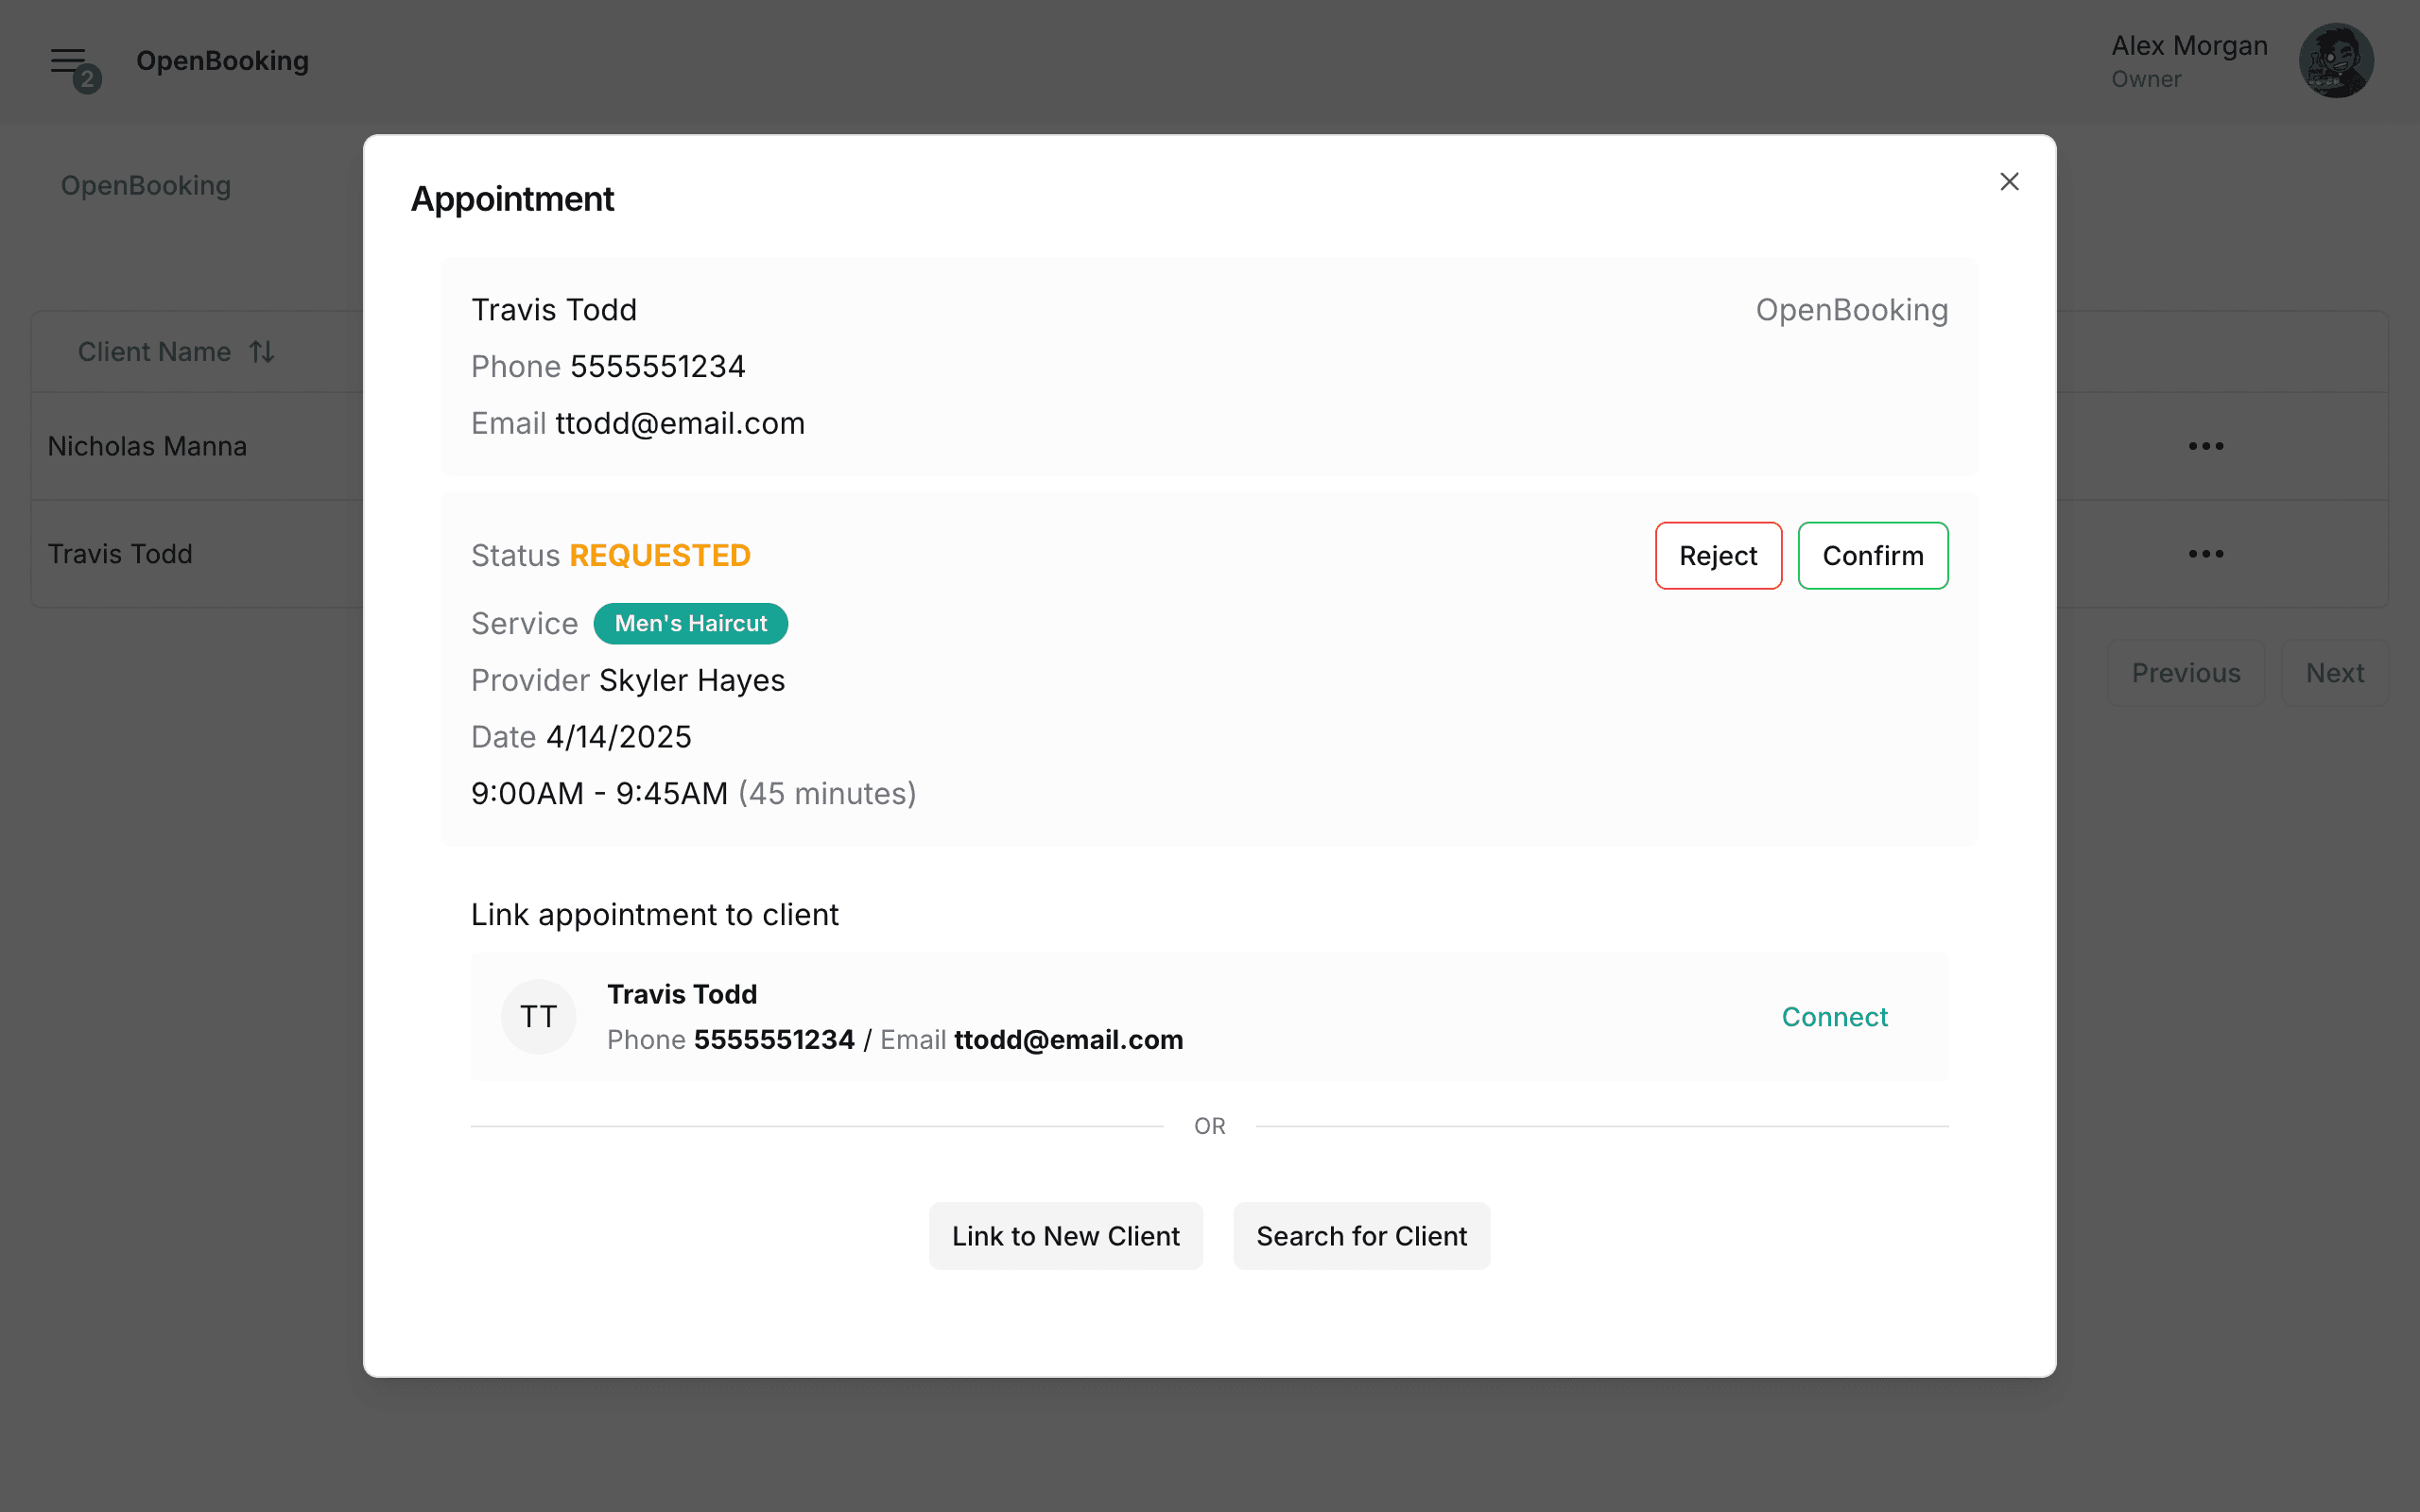
Linking OpenBooking appointments to existing clients
OpenBooking appointments can be linked to a new or existing client.
- By default we will search for an existing client with a matching name, email address or phone number and suggest linking to the matching account(s).
- You can search for a different client using the "Search for Client" button.
- Alternatively, you can create a new client using the "Link to New Client" button.